Arch Linux is a Linux distro that is famous for its philosophy of “Keep It Simple, Stupid (KISS)”. That is not very easy, but more to the system is made as simple as possible without unnecessary things. So fitting installation, we are given a system that is really minimal, we continue to ourselves who assemble any component that wants to be installed.
That’s why Arch:
- Flexible → can be fully customized according to our needs.
- Rolling release → always update to the latest version without waiting for a big release.
- But it takes more effort → manual installation (use CLI), so it is suitable to learn how to learn about Linux.
So, Arch Linux is often used by people who:
- Want a system that is light and tailored for their workflow.
- Want to learn more about Linux.
- Want to earn full control and power of their system
“I Use Arch BTW”
1. Prepare Tools and Materials
Before you start, you have:
- Flash at least 4GB → make a bootable installer Arch Linux.
- The latest ISO Arch Linux → download from the official website archlinux.org.
- Bootable tool: can use Rufus (Windows) or dd / balenaEtcher (Linux).
- Internet connection → mandatory, because the Arch installation uses download packages directly from the repo.
-> Without the internet, the installation of the Arch will be stuck. So make sure there is a Wi-Fi/LAN that is on.
2. Boot from USB Drive
- Restart the PC/laptop → enter BIOS/UEFI.
- Change the boot priority so that the USB is in the first place.
- Save the settings, then boot from the flash.
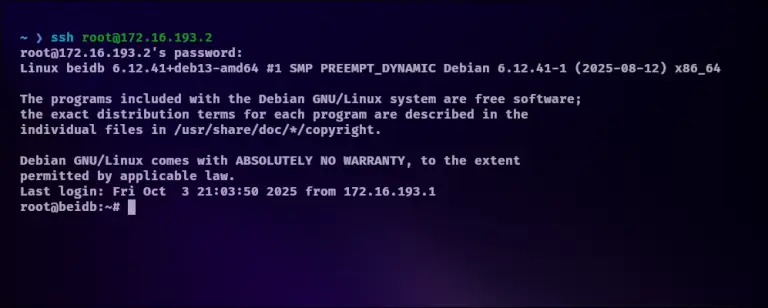
-> If successful, you will go to the Archive live terminal (usually root@archiso prompt).
3. Internet Connection Check
Arch is rolling-release, so it has to be online. Try:
ping archlinux.orgIf there is a reply → internet is safe.
When using Wi-Fi, use:
iwctl-> Then connect to your Wi-Fi SSID.
4. Set a Keyboard Layout (optional)
Default US layout. If you need Indo or other layout:
loadkeys us-> If you usually use QWERTY, just make it a default.
5. Time Update
Let the system synchronize:
timedatectl set-ntp true6. Disk Partition
Use fdik or cfdsk. Examples of minimal partitions:
- EFI → 512MB (FAT32) →
boot/efi - Root (
/) → the rest of the disk, ext4 - (Optional) Swap → 2–4GB
-> If you are a beginner, it is easier to use cfdisk (interactive mode).
7. Partition Format
Example:
mkfs.fat -F32 /dev/sda1   # EFI
mkfs.ext4 /dev/sda2       # Root
8. Mount Partition
mount /dev/sda2 /mnt
mkdir /mnt/boot
mkdir /mnt/boot/efi
mount /dev/sda1 /mnt/boot/efi
9. Install Base System
Use pacstrap:
pacstrap /mnt base linux linux-firmware vim nano-> You can add a base-devel if you want to develop.
10. Generate fstab
genfstab -U /mnt >> /mnt/etc/fstab11. Chroot to New System
arch-chroot /mnt12. Set Time Zone
ln -sf /usr/share/zoneinfo/Asia/Jakarta /etc/localtime
hwclock --systohc
13. Configuration Local
Edit file locale:
nano /etc/locale.genUncomment en_US.UTF-8 UTF-8 dan id_ID.UTF-8 UTF-8, then generate:
locale-gen
echo "LANG=en_US.UTF-8" > /etc/locale.conf
14. Set Hostname
echo "archpc" > /etc/hostnameAdd to /etc/hosts:
127.0.0.1   localhost
::1         localhost
127.0.1.1   archpc.localdomain archpc
15. Create Password Root
passwd16. Install Bootloader (GRUB + EFI)
pacman -S grub efibootmgr
grub-install --target=x86_64-efi --efi-directory=/boot/efi --bootloader-id=GRUB
grub-mkconfig -o /boot/grub/grub.cfg
17. Add New User
useradd -m -G wheel -s /bin/bash yassir
passwd yassir
Enable sudo:
pacman -S sudo
EDITOR=nano visudo
Uncomment %wheel ALL=(ALL) ALL.
18. Quit and Reboot
exit
umount -R /mnt
reboot
-> Don’t forget to unplug the flash.
19. (Optional) Install Desktop Environment
After login, install the GUI so as not to just the terminal. Examples of GNOME:
pacman -S xorg gnome gdm
systemctl enable gdm
-> Reboot again, and Arch Linux with GNOME ready to use