Have you ever felt that a laptop or PC becomes more and more slow, often hangs, or even has a very stubborn virus? 😩 One of the most powerful solutions to make your device back fresh again is to reinstall Windows 11. With a clean installation, all old system files that are damaged or full of garbage will be replaced with a new, more stable system.
In this article, we will discuss the steps of reinstalling Windows 11 from the beginning until ready to use, complete with additional tips so that you are not confused in the middle of the road.
Preparation Before Reinstalling
Before you start, make sure you have prepared the following:
- Backup all important data
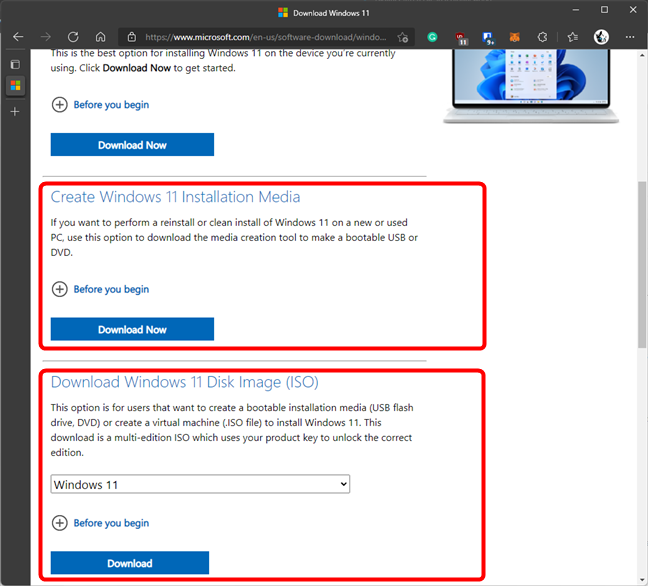
Save documents, photos, videos, or other files to an external hard drive, flash drive, or cloud service (Google Drive, OneDrive, etc.). Because once the system partition is deleted, all data will be lost. - Create a Windows 11 bootable USB
Use a minimum of 8GB of flash. To create an installer, you can use the official Rufus or Media Creation Tool from Microsoft. It will serve as the “digital installation CD” today. - Check the specifications of the laptop / PC
Windows 11 has minimal requirements: 4GB of RAM, 64GB of storage, 64-bit processor, and TPM 2.0 and Secure Boot active. If it doesn’t meet, the installation will usually fail. - Internet connection
Not compulsory, but highly recommended. Because later Windows needs driver updates and security patches after it is installed.
Steps to Reinstall Windows 11
1. Go to BIOS/UEFI
First, we need to tell the computer to read the Windows installer from the flash, not from the old hard drive. The Way:
- Restart the laptop or PC, then when the brand logo appears (ASUS, Lenovo, Acer, HP, Dell, etc.), immediately press the F2, F12, Del, or Esc button (each brand different).
- After successfully entering BIOS/UEFI, open the Boot tab.
- Set Boot Priority by putting USB at the top.

If this is not changed, the computer will still go into old Windows. By putting the top USB, the installation process can be started from a bootable flash.
Tip: if you are confused by the BIOS entry button on your laptop, try searching on Google with the keyword how to enter BIOS + laptop brand.
2. Boot from USB Installer
Once the BIOS settings are done, it’s time to go to the Windows installer:
- Plug in the bootable flash Windows 11.
- Restart the laptop/PC, then select boot from USB.
- A Windows installation start screen will appear → select language, time format, and keyboard type → click Next.
This part is trivial, but important. For example, if you choose the wrong keyboard layout, some keys can be different positions (e.g. @ or “).
3. Begin the Installation Process
On the main screen of the installation, click the “Install Now” button. After that, wait a few seconds until the setup process is completely open.

This button is like the main gateway of Windows 11 installation.
4. Insert the Product Key
Windows will ask for a product key.
- If you have a genuine license, enter it directly.
- If not, click I don’t have a product key.
👉 Relax, even if it is not entered now, Windows can still be used. Activation can be done later after the installation is complete.
5. Select Windows 11 Version
You’ll see a selection of editions (Home, Pro, Education, Enterprise). Choose one that suits your license.

👉 If you choose, you may later activate fail. For example, if your license is Pro but choose Home.
6. Select Installation Type
There are two options:
- Upgrade → to maintain old files & applications.
- Custom: Install Windows only (advanced) → for clean installation.
👉 It is recommended to choose the Custom option, so that the system is completely fresh without the remnants of the old error.
7. Manage Disk Partition
This part is undeniably the most crucial component of the entire process, as it lays the foundation for everything that follows.
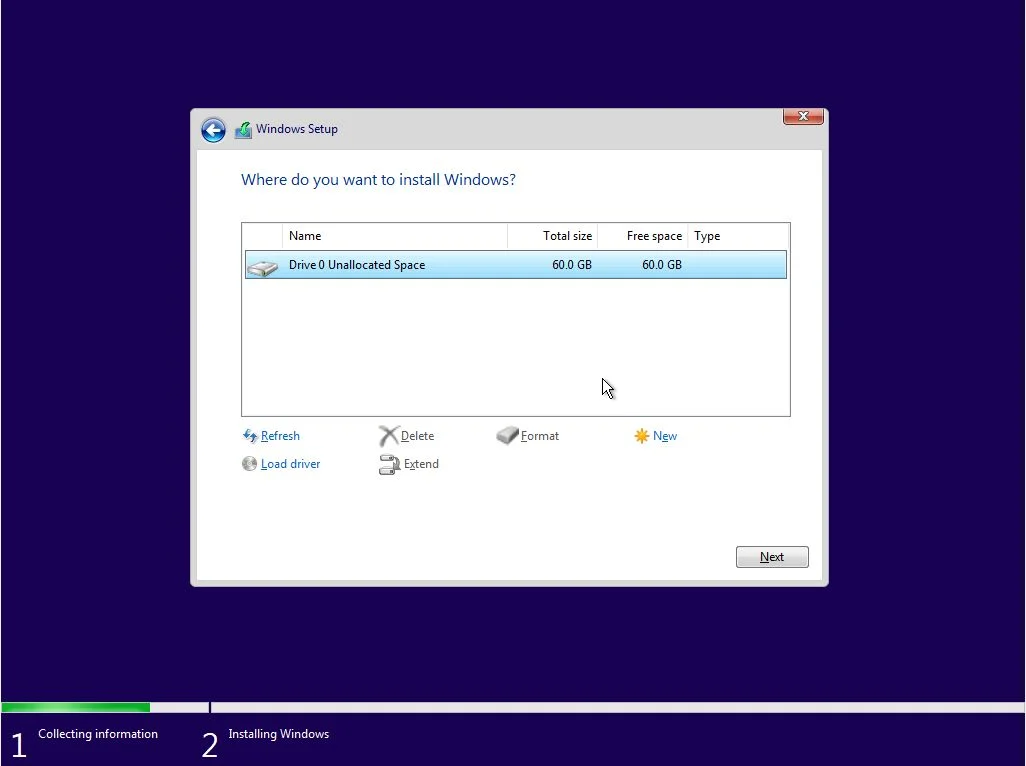
- A partition list will appear such as:
- Drive 0 Partition 1 (System)
- Drive 0 Partition 2 (Primary)
- Drive 0 Partition 3 (Recovery)
- Delete the old partition where Windows is installed (usually a C drive).
- Select the space (unallocated space) → click Next..
👉 Windows will automatically create a new system partition. But remember: all data in the deleted partition will be lost.
Tip: If there is important data on the D or E drive, do not touch it. Focus on uninstalling system partitions.
8. Wait for the installation process
Windows will copy files, install features, and set up the system. This process usually takes 15-30 minutes, depending on the speed of your laptop / PC.
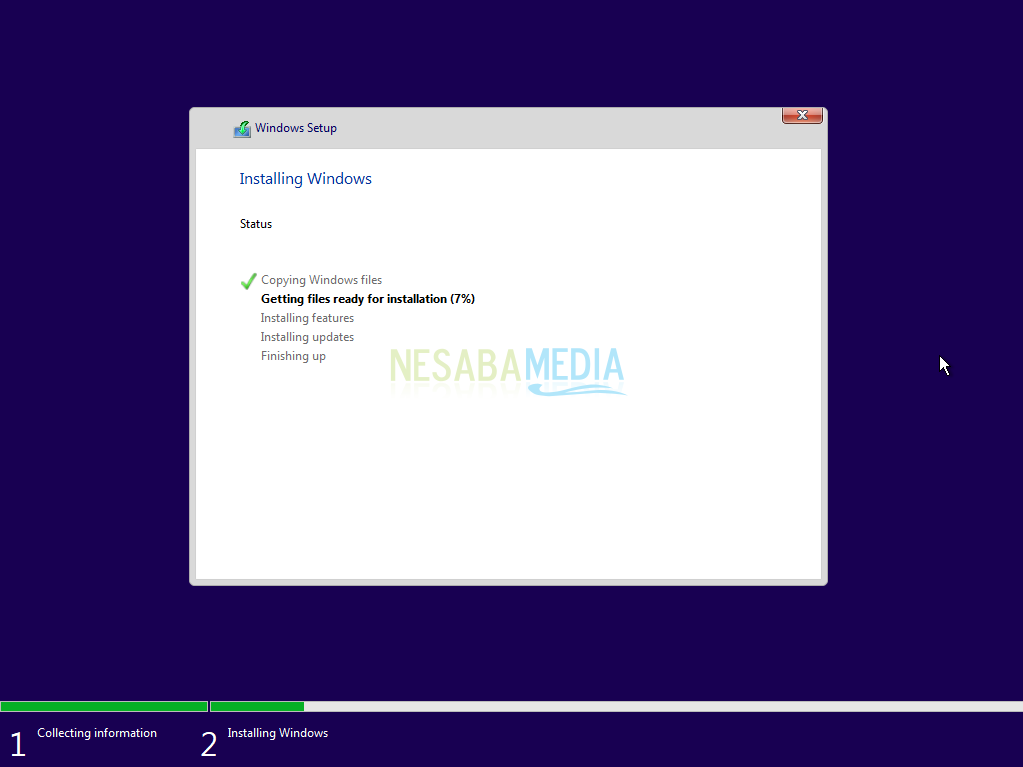
👉 Don’t be surprised if the computer restarts itself a few times. That’s normal.
Initial Setting After Installation
After the last restart, Windows 11 will go to the OOBE (Out of Box Experience) level, where you need to perform the initial configuration:
- Choose country & language.
- Connect to a Wi-Fi network (if any).
- Enter your Microsoft account or create a local account.
- Customize privacy settings (location, diagnosis, advertising, etc.).
👉 Once done, Windows 11 will go to the main desktop with a fresh look.
Things to do after reinstalling
- Install the latest drivers
Download from the official website of the laptop / PC so that all hardware (Wi-Fi, audio, graphics) can function normally. - Run Windows Update
So that the system is safe, stable, and has the latest features. - Installing important applications
For example Google Chrome, Microsoft Office, photo/video editing applications, and antivirus. - Restore backed up data
Make important files to laptops / PC so that the work can continue.
Conclusion
Well, now your laptop or PC has been successfully reinstalled Windows 11 🎉. With a clean system, performance becomes faster and more stable, error-free, and safer.
Additional tips:
- Don’t forget to enable Windows with an official license so that all the features of normal roads.
- Diligent Windows updates and applications so that the system is always up to date.
- Carefully install the application from the internet, make sure from reliable sources.